Introduction
Film history is loaded with notorious and unmistakable beasts that have carried bad dreams to innumerable individuals. In 1979, the film Outsider presented a startling thought of what a savage outsider animal varieties might resemble.
Note: After learning this tutorial visit more drawing for kids tutorial.
The plan was not normal for some other portrayal of an extraterrestrial, and it stays well known right up 'til now. The Xenomorph has showed up in many movies, computer games, comic books and that's only the tip of the iceberg, and many individuals like to figure out how to draw a Xenomorph too.
For aficionados of this scary extraterrestrial, this guide will be the ideal method for figuring out how you can address it in certain craftsmanships. We want to believe that you live it up as you work with us on this bit by bit guide on the most proficient method to attract a Xenomorph only 6 stages!
Stage 1 - Draw a Xenomorph
The exemplary Xenomorph configuration was made by the craftsman H.R. Giger, and the top of the outsider is one of the most unmistakable parts of the plan. Consequently, we will start with the head for this initial step of our aide on the best way to draw a Xenomorph.
The highest point of the head is a long, adjusted shape that stretches out over the back, so you can utilize a bended line to draw this part of the head as it shows up in the reference picture. The substance of the Xenomorph is little and squat contrasted with the remainder of the head, so you can involve a few additional rakish lines for the little open mouth. Polish off with a straight line for the jaw, and afterward we can continue on toward the following stage.
Stage 2 - Presently, draw a few subtleties for the head and chest
This second step of your Xenomorph drawing will see you adding a few subtleties and options to the head and chest region of the outsider. To begin with, add a spiked lines within the open mouth to make sharp teeth for the outsider. We will then, at that point, be defining a few bended boundaries within the head framework to give it some more definition.
Then, we will start the arms and chest of the animal, and you can start this arm by utilizing a few bended lines. The arms are very slight and solid, and we may be drawing the shoulder, biceps and elbow until further notice. The chest of the outsider is very flimsy and hard, and by utilizing a few bended lines you can flaunt the hard ribcage of the Xenomorph.
Stage 3 - Draw the other appendages for the Xenomorph
Presently you're prepared to polish off the layouts until the end of the appendages for the outsider in this third step of our aide on the best way to draw a Xenomorph. In the first place, draw the hand toward the finish of the arm that you began in the past step. This hand will have long fingers that come full circle in a few sharp, pointed paws.
Then, at that point, draw a comparable looking arm on the opposite side, and have this one raised a little. The legs will then, at that point, be drawn for certain more bended lines to show them bowed underneath the outsider. These legs will be a lot thicker than the arms were, and how they're situated will prepare the outsider hope to jump.
Stage 4 - Next, move the back spikes and tail for the Xenomorph
This fourth piece of your Xenomorph drawing will see you adding an additional notorious components to the outsider. The first of these will be the thick, adjusted spikes that jab of the rear of the animal. Draw three of these stunning shapes, and afterward we can add the tail.
The tail of the Xenomorph is long and awe-inspiring, and it has sharp spikes jabbing off the highest point of it. There are likewise a ton of line subtleties on the tail to make it look isolated into a few fragments. The last parts in a huge, sharp three-sided shape, and whenever that is drawn we can then continue on toward the last subtleties in the following stage.
Stage 5 - Add the last subtleties to your Xenomorph drawing
You have polished off the framework of the outsider, so in this step of our aide on the best way to draw a Xenomorph we will polish off the last subtleties and contacts. There are a few adjusted, sharp shapes on the legs of the Xenomorph that have lines drawn within them for some surface.
Polish off by adding some unobtrusive line subtleties all through the Xenomorph attracting to make it look considerably more powerful. Then, you could polish off for certain additional subtleties and options of your own to truly polish it off. One thought is draw a foundation, and you could involve your #1 scene from the different Outsider movies as motivation.
Note: Visit the Early Childhood Education blog.
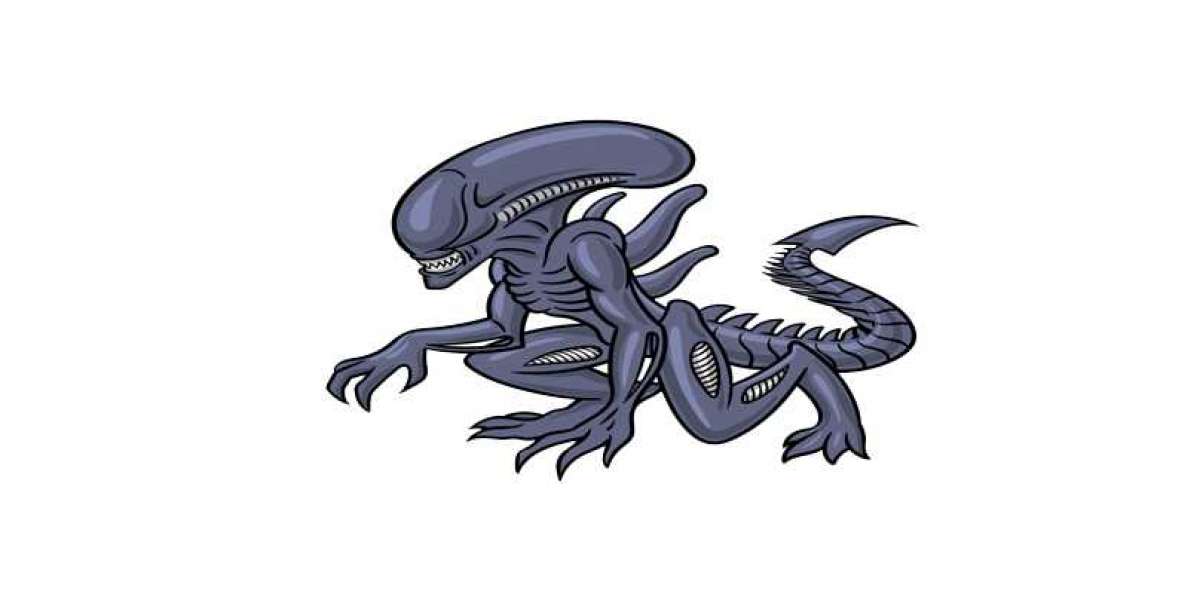
Stage 6 - Polish off your Xenomorph drawing with variety
There are a couple of Xenomorph varieties all through the Outsider establishment, yet this Xenomorph drawing has the exemplary dull variety plan of the first. The outsider in the movies has somewhat of a try to please, so utilizing these lighter shades assists with making the skin look a piece shinier.